Tuesday, April 30, 2013

Tutorial- the demon inside

Easy tutorial for this week. Remember the pug from last time? He's got a little friend:
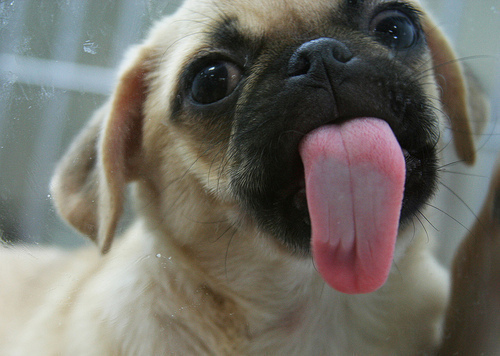
"I can haz eat the pug?"
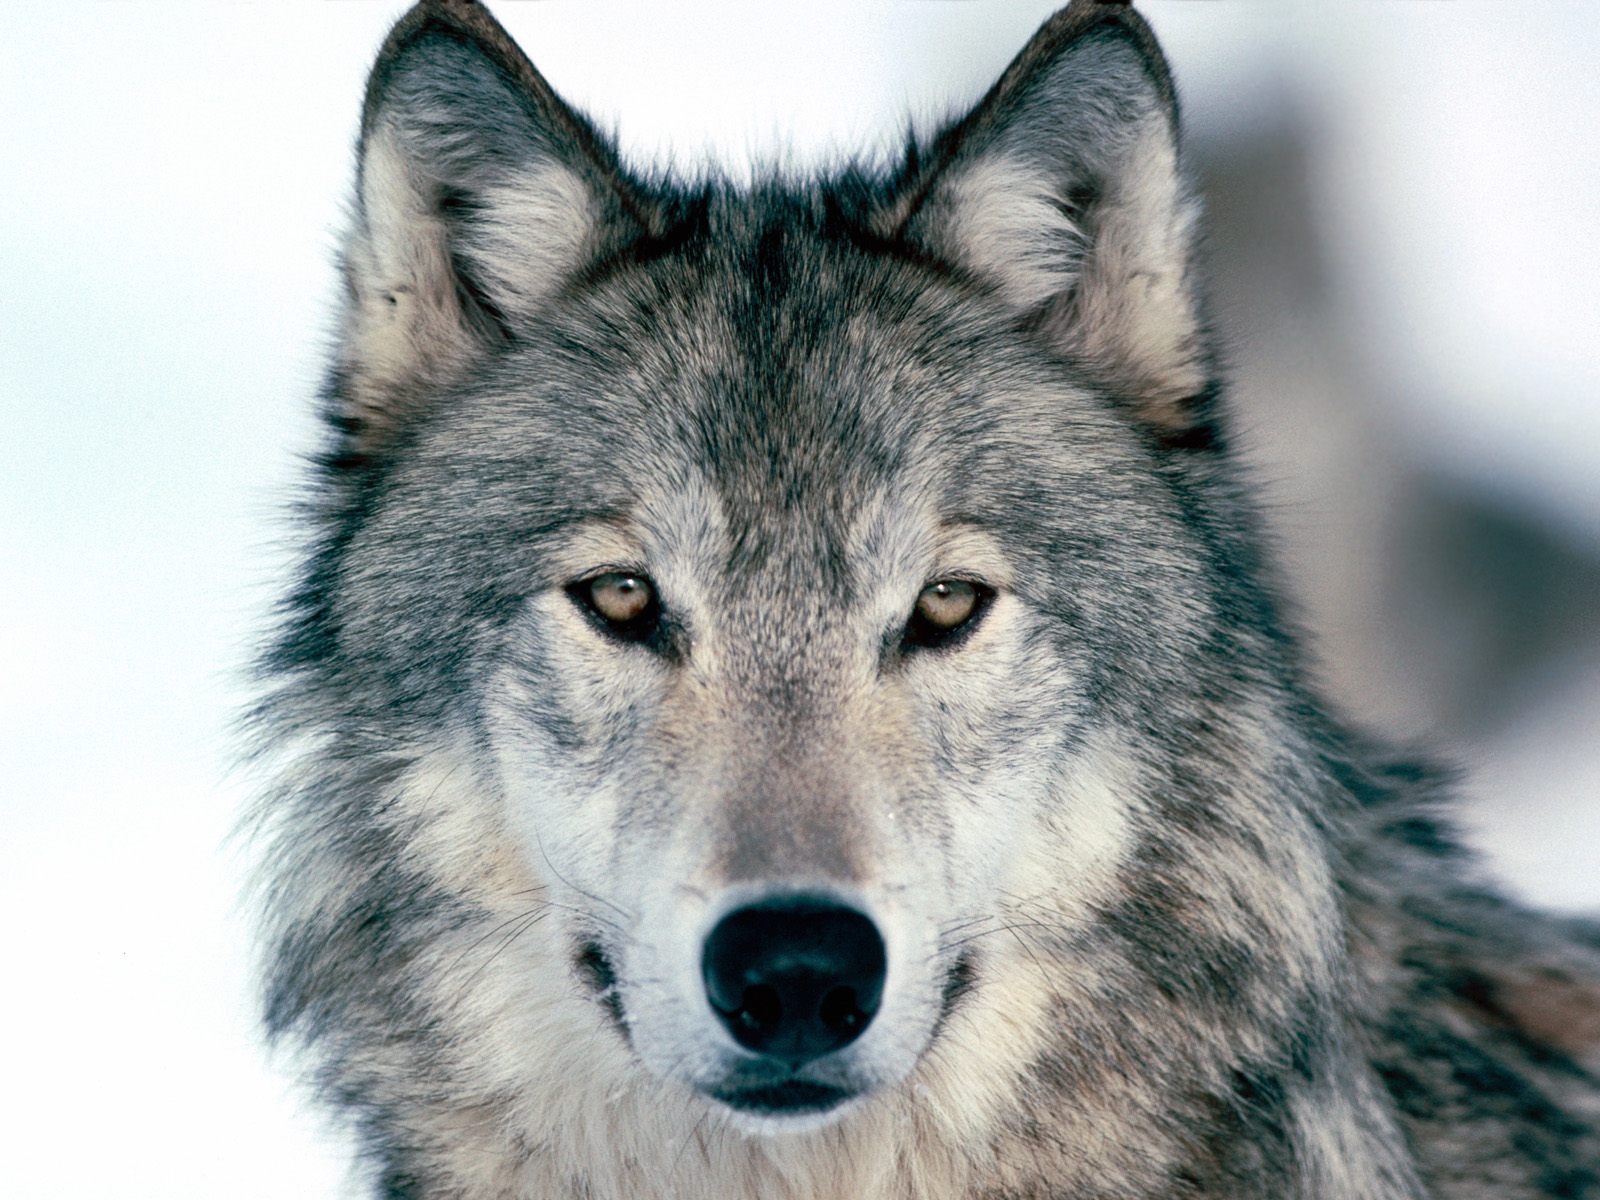
But this wolf is giving the guy smack:
"EVILLLLL...."
Time to power up the first guy! First, follow the emo blue pictures tutorial, but omit the eye effects for now. We'll do that later. 
This time I did 1x color cool, 3 units shadow, 2 units lighting, 1 unit contrast. The result:
"Gr."
Next step is tricky. See that pair of scissors in the toolbar on the left? Click. 
Select "polygon freeform" or something like that, then trace the eye area. Select "color tint," and pick a color!"
*try for simple names, like red. 
Repeat with other eye. 
"Cadex, I turned into a wolf."
Gotta get that manly dog scar in there, pencil tool: 
"OctoboDogSprite is here."
"OctoboDogSprite on candy."

Well, that's essentially it. I don't know about you, but for 10 minutes and a free website, that looks pretty good. 
BTW, crazy colors is the "groovy rainbow" animation. Or maybe "groovy colors," I don't know. 
"No 8ro, I win!!!!!!!!"

Cheers!


Photo Tutorial- those emo blue photo things

You know what I'm talking about. Those emo, blue-lit, dark pictures. Stuff like this-
"My picture is UNIQUE and you'll like it!"
"Being an elf is hard..."
"Reach, dang it!"
"Imma gonna smack you with dis magic, gurl."
For the sake of easiness, I'm going to imitate the styles of the bottom two... in Lunapic!
Here's the challenge- can I use Lunapic effects to make a picture of ice cream look emo? What about a puppy?
Ice cream first. Here we go-
First, I uploaded image. Bloop! That's the noise it makes in my head. I go over to "Adjust," go down to "color temperature," and move the colors down to the "cool"est they go. 
Not close enough, but definitely getting darker. 
Next, over to "Adjust," "adjust colors," brightness all the way down. 
Ehh... I'm not thrilled. Back to step 1.
Nope. 
So this time, I'm taking the original to black and white first- under adjust, of course. :)
This time, I took the image to b&w, then put it through TWO ROUNDS of full cool color temperature changer. Then, I went to "adjust color," pushed the brightness all the way down, then pushed blue a little bit up. A little. Otherwise THE PICTURE LOOKS LIKE THIS!

Nope, not quite. I've got one more trick up my sleeve....
Go to "adjust light levels." Let's bring shadows up 1.5 units, lighting up 1 unit, and whatever the top one is (contrast?) up like 3 units. 
"By golly, we've done it!"
There you have it. Cool-lit, depressing ice cream. 
Now for that puppy. 
*G4SP! 4 HUM4N PUPPY!"
Same procedure. B&W, 2x color cool, adjust shadows up (more than 1 unit), adjust lighting up (1.5 ish), adjust contrast slightly up. The result...
"TH3 HUM4N PUPPY FOUND 4 SN4CK!"
There you go. I have no idea how that ice cream got there *tutorial forthcoming*. 
Please enjoy your newfound emo art skills! 
Someone, make a folder full of emo art supplies... just please. 

CHEERS!


Sunday, April 28, 2013

Photo editing tutorial- Homestuck backgrounds

Here is my first PHOTO EDITING TUTORIAL- where you too can learn how to edit photos poorly! It's a gift, folks, a gift.
Some of the landscapes in Homestuck look like this- drawn, like in a really hard way.
But some are like this- recolorized:
BTW, we're looking at the background here not the guy. 
Do you want to learn how you too can make recolorized images like this? Yes. Yes you do. 
Start by going to Google Images. Decide if you want to do like an indoor scene, or an outdoor. I'm starting with indoor!
Here's the one I picked: 
Lame, right?
Hop over to Lunapic.com and upload the image by URL or by saving to your computer. Under the "Adjust" tab, there's a link that says "Two-tone color" about half-way down. Click. 
Pick two colors!
Here are some of mine: Light color blue, dark color red: 
Some lime and some dark green^^
I call this one "Indoor land of greige and blue-dom"
Nice, right? Now you slap this bad boy onto GIMP and create a new layer to add your skillfully drawn anime characters onto... easy backgrounds. Let's try this with others, shall we?
"Land of real stuff and yawns"
Oh yeah. 
Land of Reality and like, Mountains
Land of Desert Rats and Windows Vista Backgrounds
If, like in this example, you use a light color for the "dark" tone, and a dark/bright color for the "light" tone, you get a temperature swap- snow, anybody?
Okay that's it. Comments if you'd like more terrible Lunapic edit tutorials!